You can find this item at BMW E46 LED Halo Rings (80-108), also applies for 80-208, 80-212, etc.
BMW halo rings are perhaps one of the most recognizable car symbols today. Halo rings are always being upgraded with new technology so BMW owners are even upgrading their stock lamps to newer halo rings for a classy and luxurious look. There are plenty of BMW LED halo rings that are catered to each individual BMW owner, with plenty of unique options and stylistic features that are sure to impress.
For drivers who purchased 80-109 for the 2005-2006 BMW LCI 3 Series coupe/convertible, the headlight housing does come in one piece so there is baking/opening required to install the halo rings into the headlights.
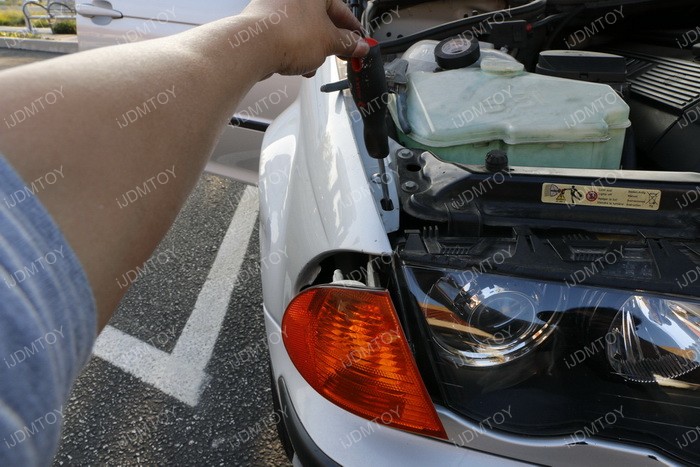
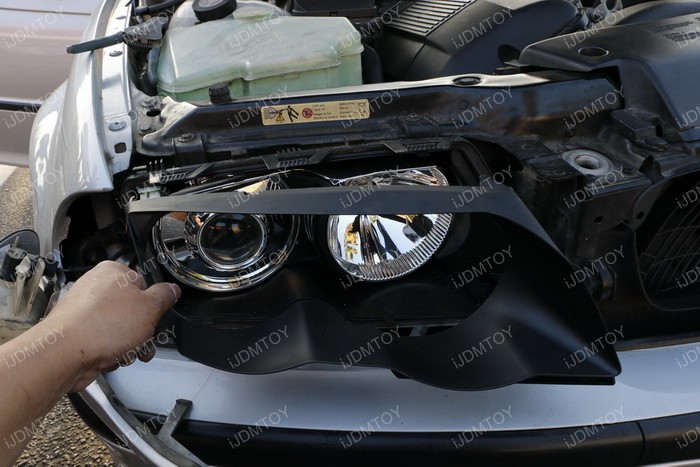
Step 1: Take a long screwdriver and insert it into the hole to remove the turn signal lamp.
Step 2: Remove the trims.
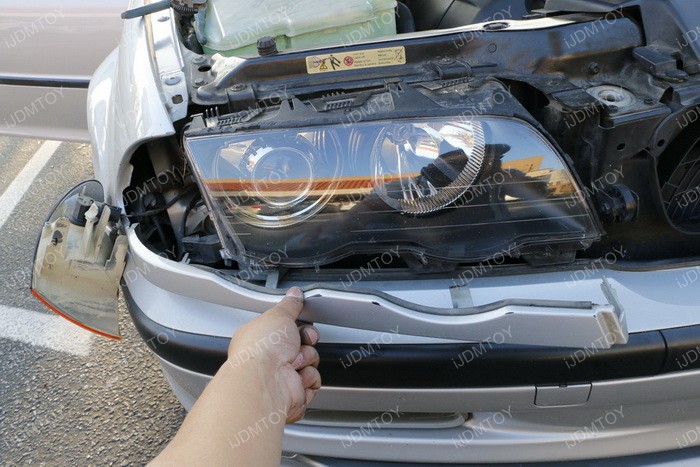
Step 3: Remove the lens and the inside trim.
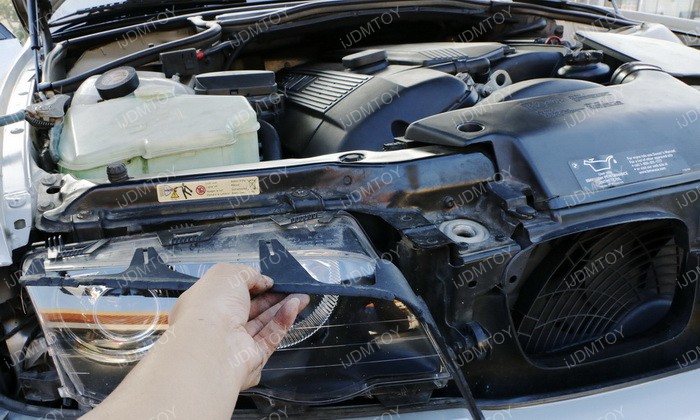
Step 4: Clip on the LED angel eye rings. Grab the two black wires through the low beam bulb back openings.
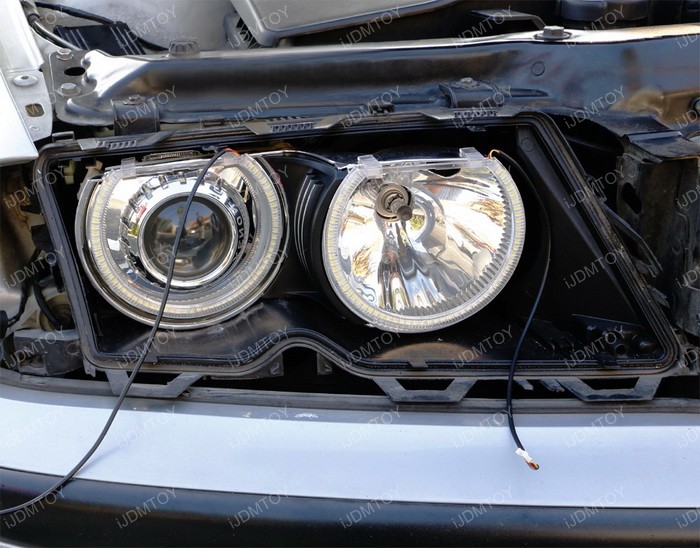
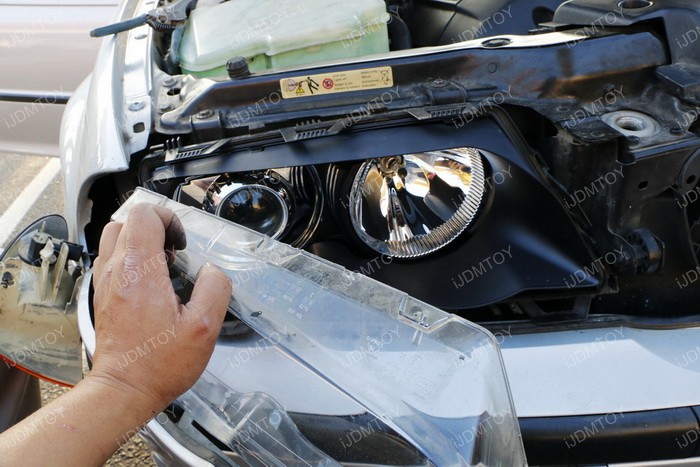
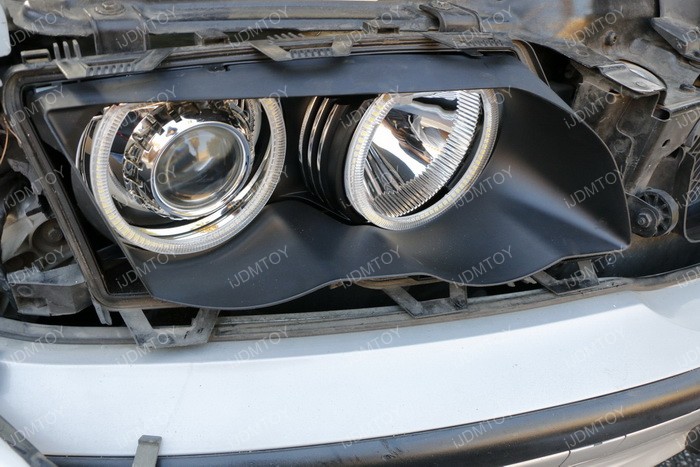
Step 5: Put back the trim. If you install it properly, you will see that the LED halo rings align with the inside trim. You don't have to worry about the rings protruding out because the rings will be pushed back to their appropriate location when you install the lens back.
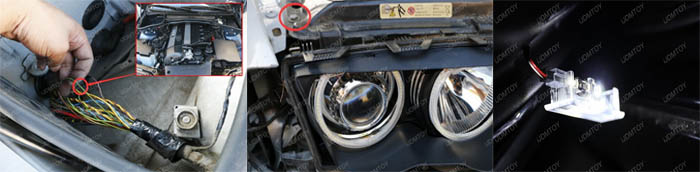
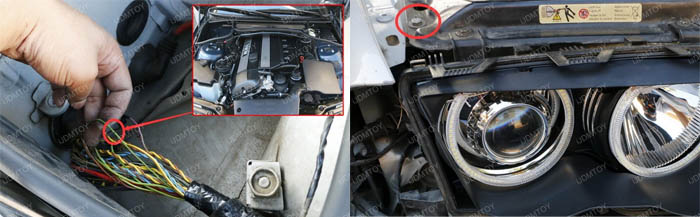
Afterwards, please work on the driver side since later you need to connect the wires together.
Step 6:
80-109, 80-110, 80-111 SINGLE COLOR WIRING GUIDE:
Red wire to ACC 12V+
Black wire to Ground
Optional White wire to firewall hole to passenger side foot area positive

80-108 SWITCHBACK WIRING GUIDE:
Plug the two wires to the module box.
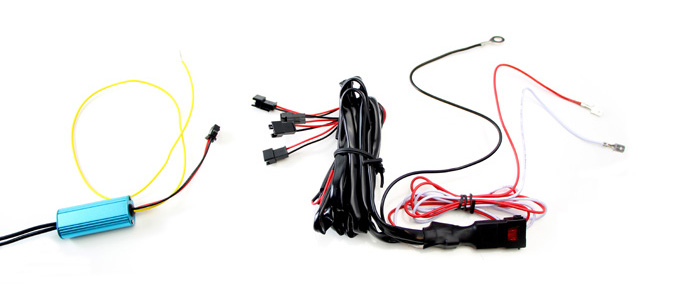
On the other end of the module box:
Red wire to ACC 12 V+
Black wire to Ground
White wire optional to foot well light
Yellow wire to turn signal

80-112 RGB WIRING GUIDE:
Red wire to ACC 12V+
Black wire to Ground
Step 7: Test everything to make sure the BMW E46 LED halo rings work. Put everything back.

Enjoy your new BMW E46 LED halo rings! Special thanks to Andrew and Mario from Euro Trash to provide us the car for this installation guide.