Note:
- This installation guide applies for both single piece as well as multi-piece LED scanner light bars
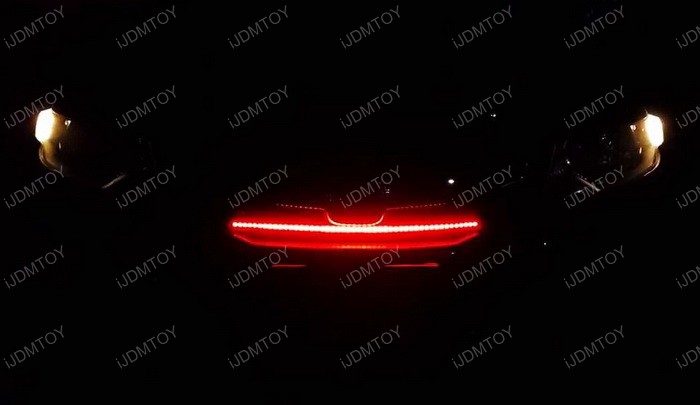
- Since this product is a Knight Rider scanner LED light, the light pattern is meant to cycle through the strip without a solid color function.
You can find this product under LED Scanner Knight Rider Kit
Step 1: Mount the LED Knight Rider scanner bar to the center grille with zip-ties. We recommend zip-ties for long lasting application, since the zip-ties are a semi-permanent way to secure the LED strip. If you want to remove the strip in the future, you can always cut the zip-ties.
We recommend that you secure every 12 inches of the LED strip with zip-ties. It helps to have a friend to help you hold the LED strip in place when you secure the zip-ties to the grille.
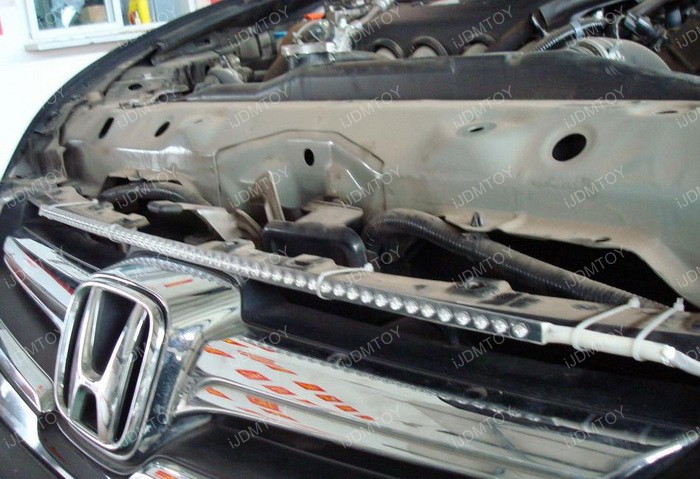
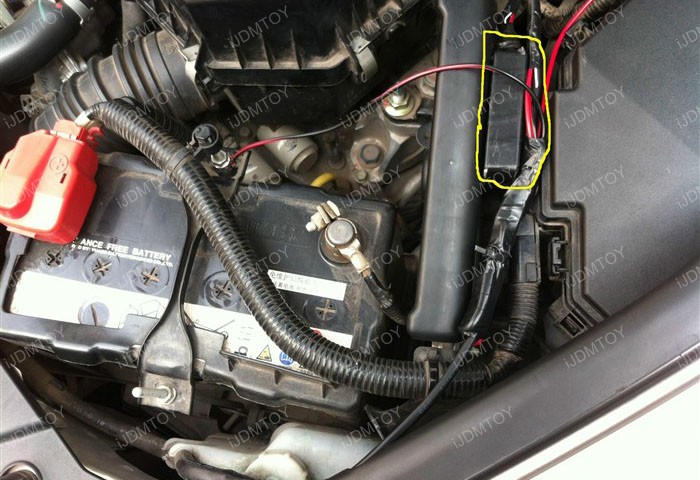
Step 2: Route the LED strip wires to the engine bay towards the battery.

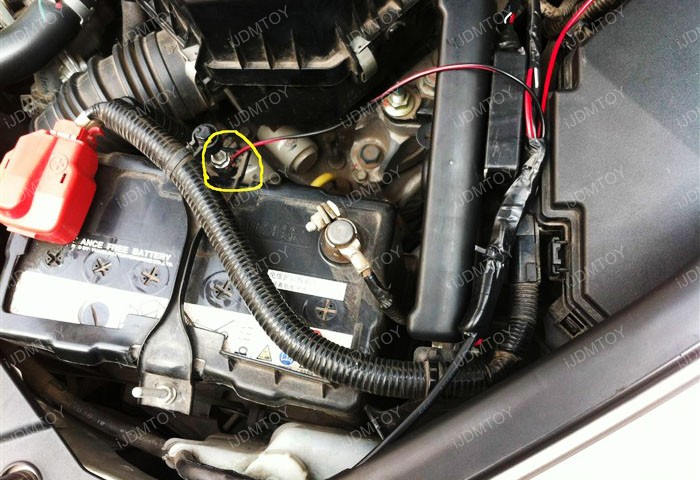
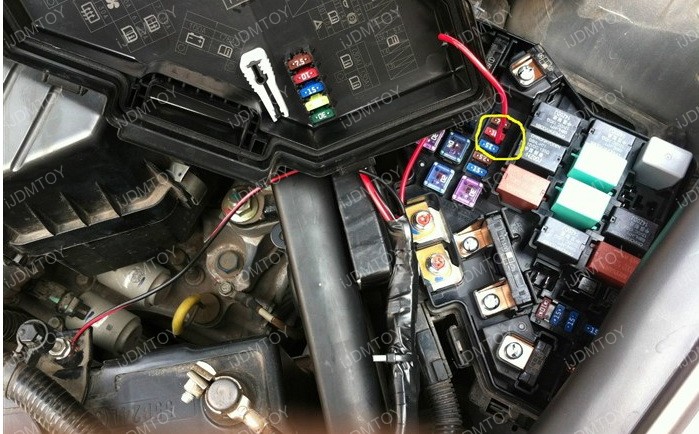
Step 3: Connect the black wire to the ground and the red wire to battery positive. If you want the LED scanner to work when the engine starts, you can connect the red wire to fuse box ACC.
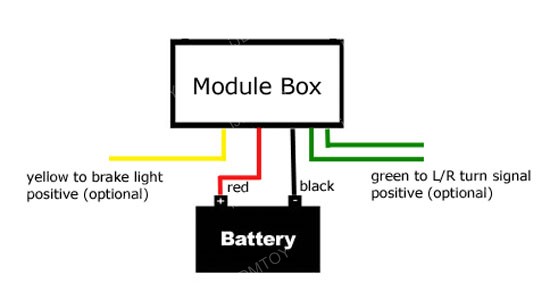
If there are any other wires, you can check the instruction guide included for its purpose.
Step 4: Secure the module box by placing it close to the battery, but away from the engine or radiator. This is so there is no risk of heat damage. The module box must stay perfectly dry at all times so placing it near the battery/fuse box will guarantee that.
Check to make sure everything works and enjoy your new LED Knight Rider Scanner Lights.
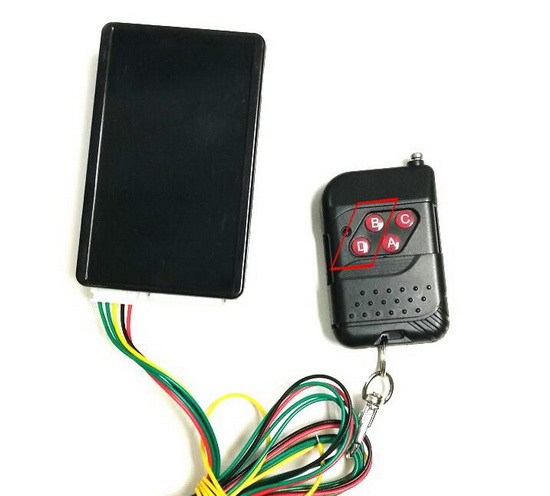
Q: What do I do if the red indicator light on one or more buttons don't light up?
A: If the red indicator lights are not functioning, this means the batteries are running out. To replace it, unscrew the bolt in the back of the remote control to reveal the battery and replace it. This remote control takes 23AE 12V batteries.

Q: What are the functions of the remote?
A: The primary functions lie on the left columns, boxed in red below. The bottom button turns the knight rider LED strip light on and off, while the top button changes its flashing pattern. The buttons on the right column control how fast or slow the LED lights flash.