


This is an installation guide for the following SKU: 70-202 and 70-203.
You can find this product under Jeep Wrangler LED Headlights.
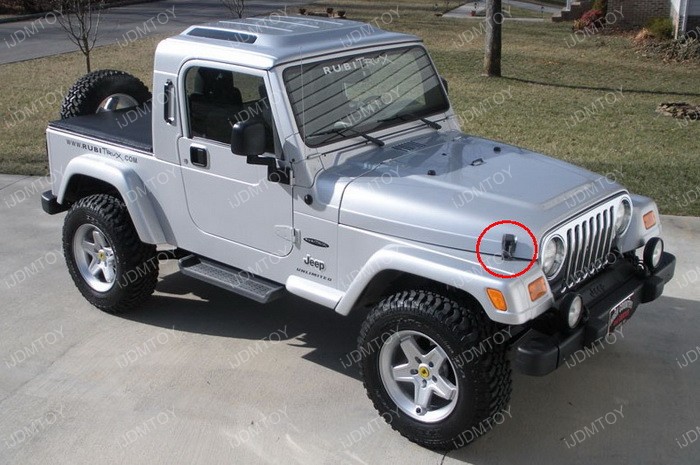
Step 1: Release the hood hatch by unlatching the clips in red.
Step 2: Remove the screws/clips in the front grille and remove the front grille to gain access to the headlights.
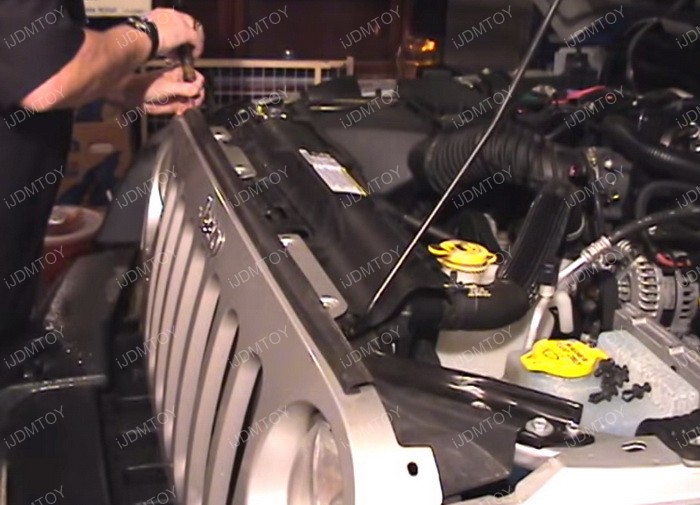
Step 3: Put one hand at the bottom of the grille to pop it up and use your other hand to pull out the grille.
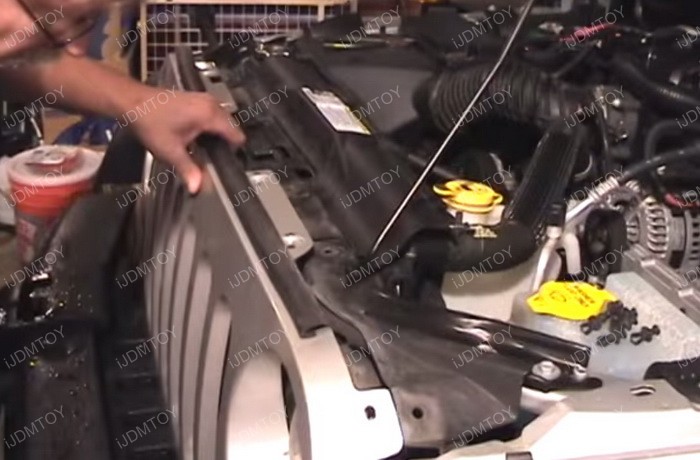
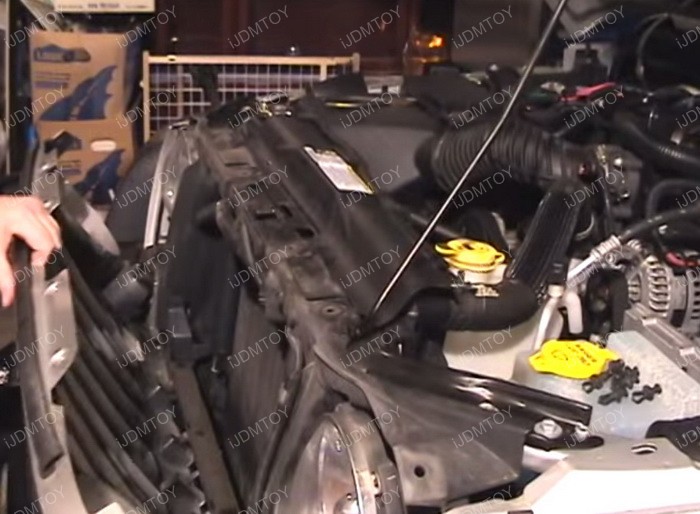
Step 4: Remove the screws that hold the metal ring around the headlights.
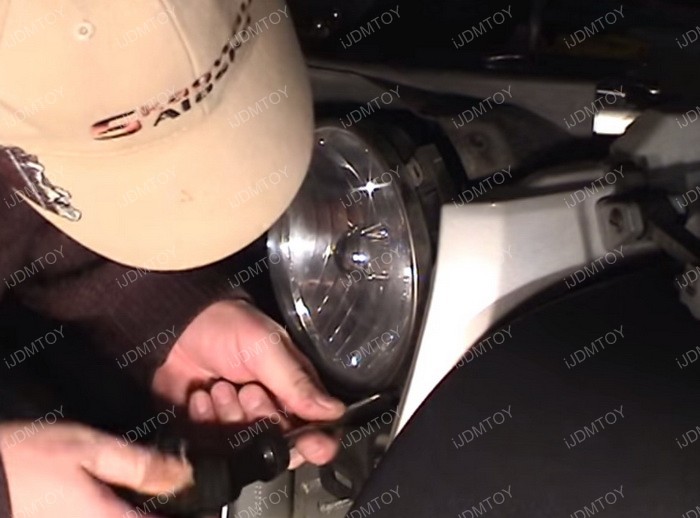
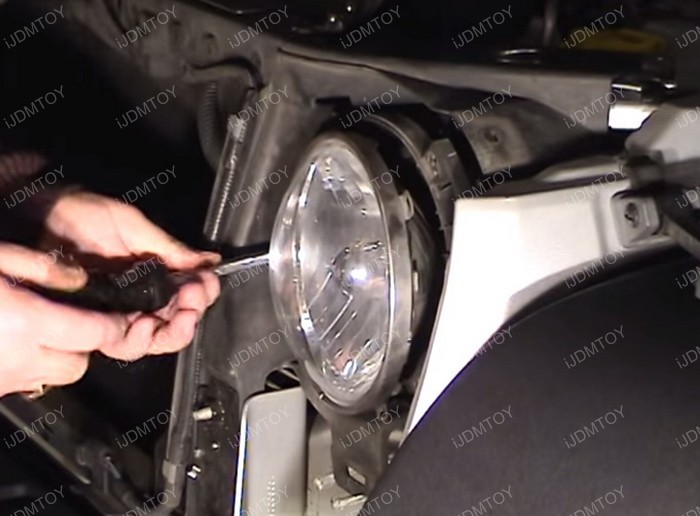
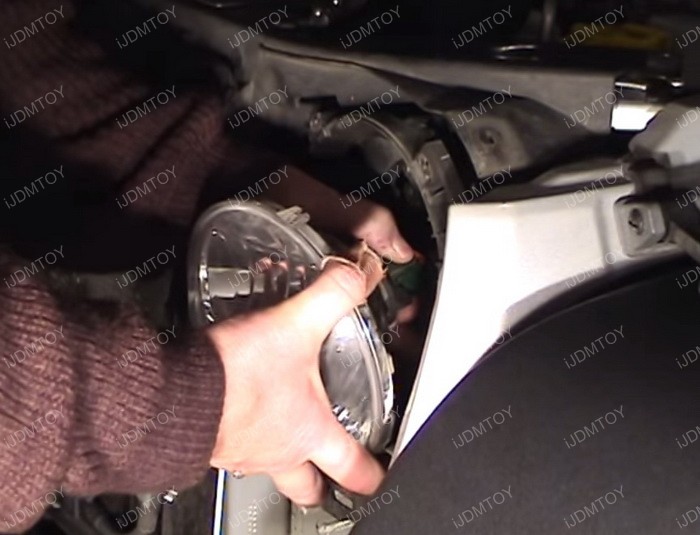
Step 5: Remove the metal ring and remove the headlights.
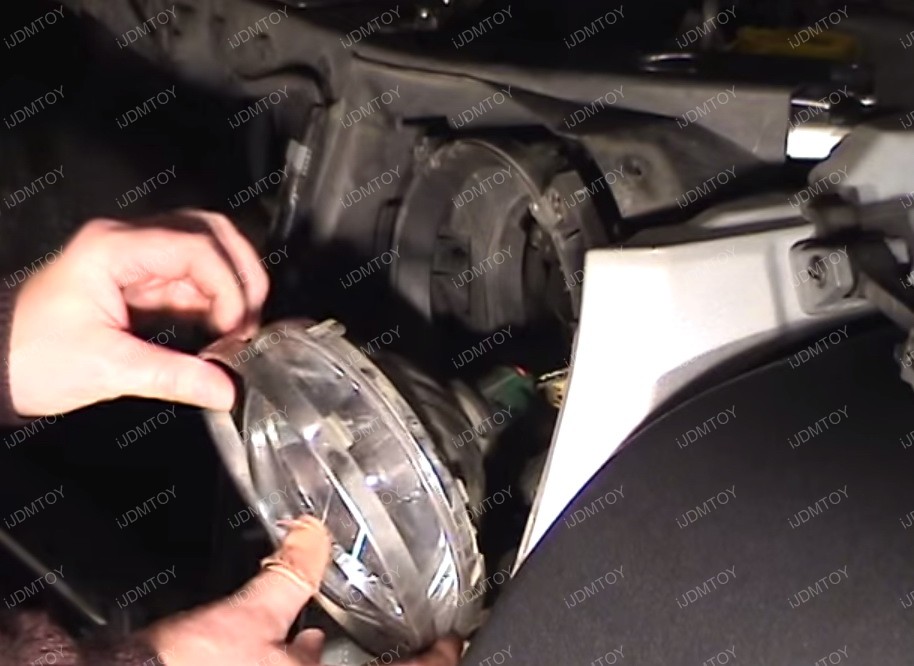
Step 6: Unplug the headlights.
Installing the LED headlights is very easy. You will need to replace everything in the exact reverse so you can put back the 7 inch LED headlights.
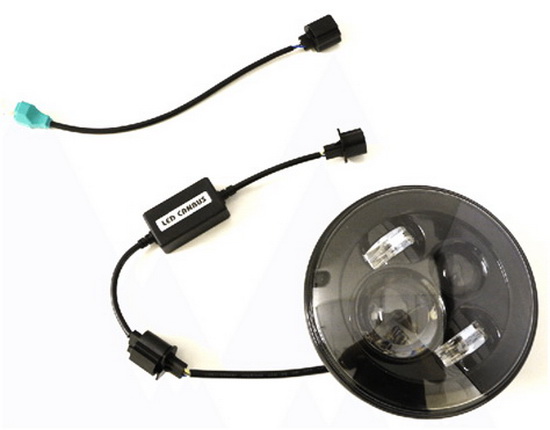
(70-202) LED Headlights Wiring Guide:
Connect the 7 inch LED headlights to the anti-flicker LED CAN-bus driver module box. You MUST install these Jeep Wrangler LED headlights with the module box or you risk burning out your LED headlight.
Connect the module box back to the headlight harness.
This 7" round speaker shape LED headlights also comes with an H13/H4 adapter so if you need these LED headlamps to fit an H4 socket, you can connect the module box to the H13 to H4 conversion adapter and then connect the conversion adapter back to the headlight harness.
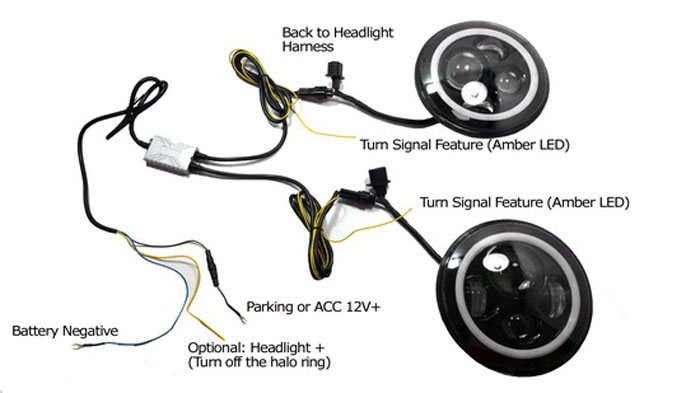
(70-203) Switchback LED headlights Wiring Guide:
If you purchased the more advanced 7" round speaker shape LED headlights with switchback features, you will first need to connect the LED headlamps to the anti-flicker LED CAN-bus driver module box. Again, you MUST install these Jeep Wrangler LED headlights with the module box so you don't burn out your LED.
Tap the single yellow wire to the left and right turn signal positive.
Connect the other side of the wires to power (the one with fuse box to parking light positive or ACC 12V+ in the fuse box; the blue wire to ground, and the optional yellow wire to headlight positive if you want to turn off the LED halo ring when headlight is on)
Troubleshooting Tips:
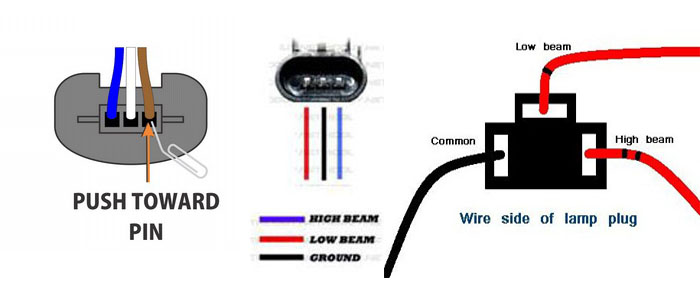
Symptom 1: Vehicle uses H4 socket instead of H13.
Solution: Use the H13 --> H4 conversion adapter.
Symptom 2: The adapter is difficult to unplug.
Solution: Take a flathead screwdriver, stick it into the adapter, and push in the inside tab towards you to unlock. Press the outside tab and pull the adapter to release.

Symptom 3: High beam does not work at all during initial installation.
Solution: Check both the adapter on the LED headlights and the LED driver module box. Make sure no pin(s) are pushed out. If connections are secure and problem persists, it means the wiring configuration of this LED headlight is not matching up with your stock harness. You need to try re-pin the adapter.
Check out this video on how to Re-pin the adapter
Symptom 4: High beam takes a couple tries to turn on.
Solution: This means that there's not enough power being supplied, due to cold weather, old wiring, or battery not fully charged. Please check if the battery needs replacement or add a relay harness to directly draw the power from the battery.
Symptom 5: High beam turns on and off intermittently.
Solution: Double check the wiring connection, make sure there's no loose connectors. Also make sure the LED driver module box is fully secured to the back of the LED headlight on the chassis so that it doesn't hang.
Symptom 6: High beam periodically flickers.
Solution: You will need an Anti-Flicker Decoder.
Symptom 7: Issue is always on one side.
Solution: Perform a swap test. Switch the LED driver module box from driver side to passenger side and passenger side to driver side.