You can find this Kia Optima LED Daytime Lamps (70-732) here.
*INSTALLATION NOTE: Modification of the front factory crash beam is required so please proceed at your own risk. iJDMTOY is not responsible for any type of damage or harm that may occur due to the modification of the factory crash beam. Installation of these lights requires this to be done*
1.) Remove all the clips and screws from the top cowl portion of the vehicle. There may be additional clips and screws underneath the bumper and on the side where the bumper connects to the fender (in the wheel well).

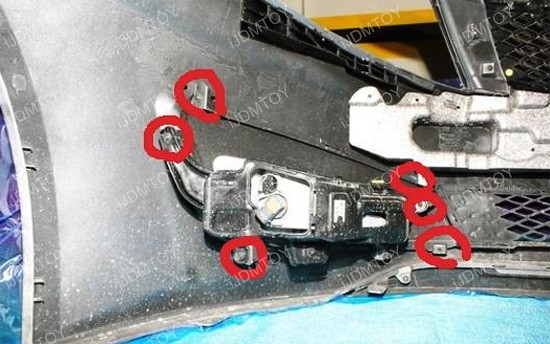
2.) Once you have removed the bumper, locate the stock fog lamp bezel and remove it. The clips/screws circled in red are what you need to access in order to remove it.
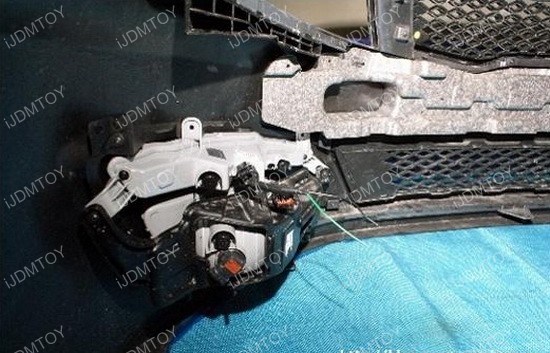
3.) Compare the stock bezel with our LED lamp bezel and install the DRL lamp assembly into the original location in reverse order as how you removed it. (Please note the LED DRL lamp bezel is available in either unpainted black plastic or a painted glossy black. This option is in the product page before ordering)


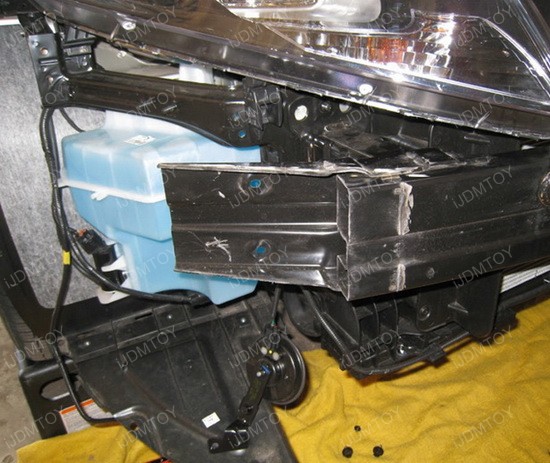
4.) Since these lights were designed directly after the Korean model Kia Optimas and that North American Kia Optimas crash bream is significantly larger than the ones in Korean version, the crash beam must be trimmed in order to fit these. It is recommended to use an angle grinder with a cutting wheel or plasma cutter (if you’re fortunate to own one) to cut the metal crash beam.
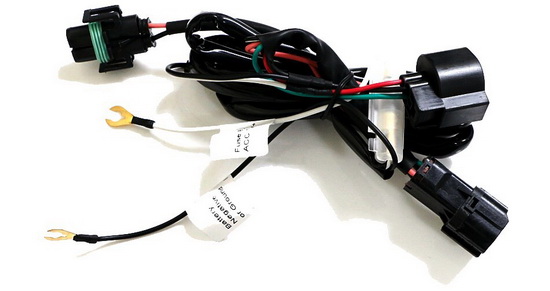
5.) When you receive the LED daytime running light assembly, the wiring harness should be plugged into the DRL already. All you will need to do is tap the white wire to the ACC 12V+ and tap the black wire to the ground. Since this LED assembly is an OEM replacement, the adapters are for the KDM version Kia Optima K5 and will not be needed for the USDM version.
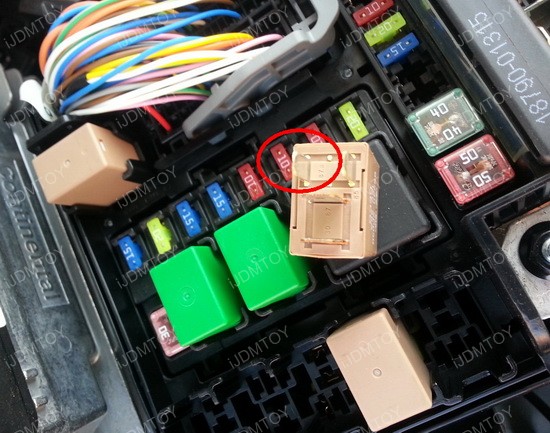
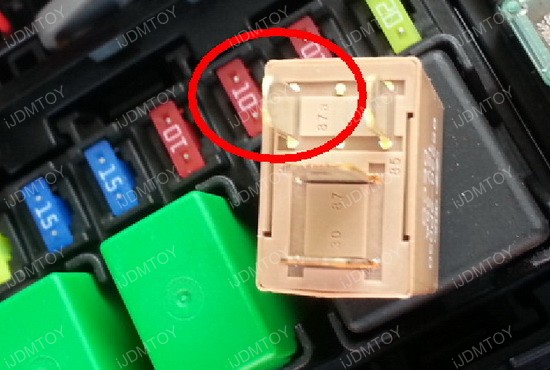
How can you tell which is the ACC in the fuse box? Open the hood and you will see that the fuse box is on the driver side. Remove the C Fan (cooling fan) 4-pin micro relay module. Tap the white wire of the LED daytime running light module box to the 87A location and plug back the module.


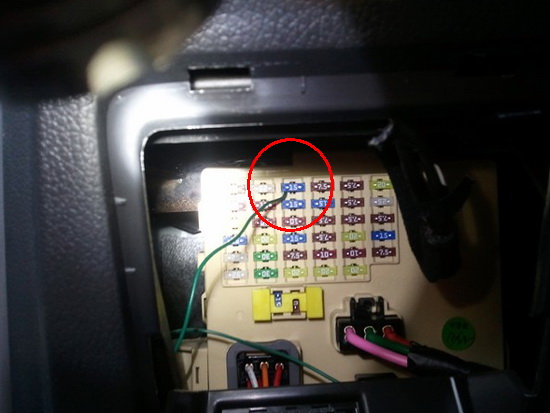
6.) Before putting everything back together, test the lights by turning on your vehicle and making sure everything is operating correctly. Issues such as flickering or not fully lighting up can be caused by an insufficient power. The relay location shown in the diagram above is recommended from an professional installer on Optimaforums.com, if it does not work in your case, you can try a different fuse box relay location or even tap the red wire to the fuse box inside the car.

7.) Once you have confirmed that everything is working as it should, install the bumper and assembly back together following the steps in reverse order. Enjoy your new lights! You can find this Kia Optima LED Daytime Lamps here.