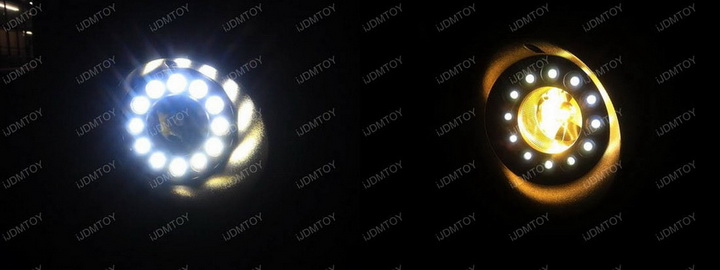
You can find this product under MINI Cooper LED Daytime Running Lights.
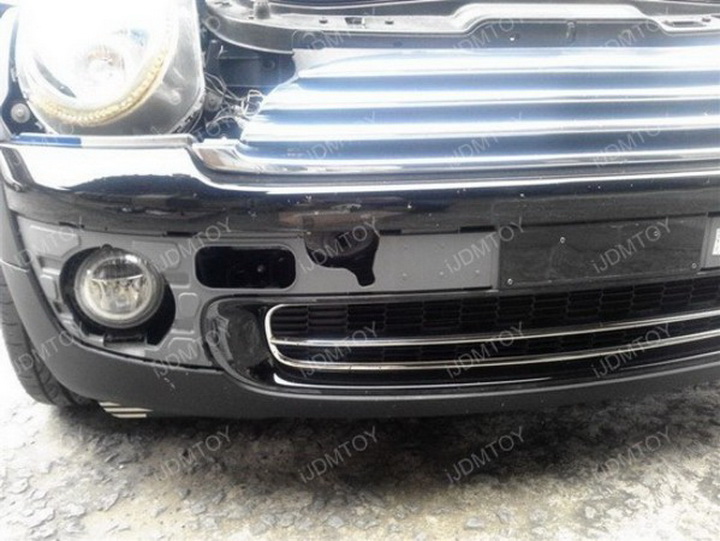
You'll be replacing the stock parking light/fog light combo located at the lower bumper location.

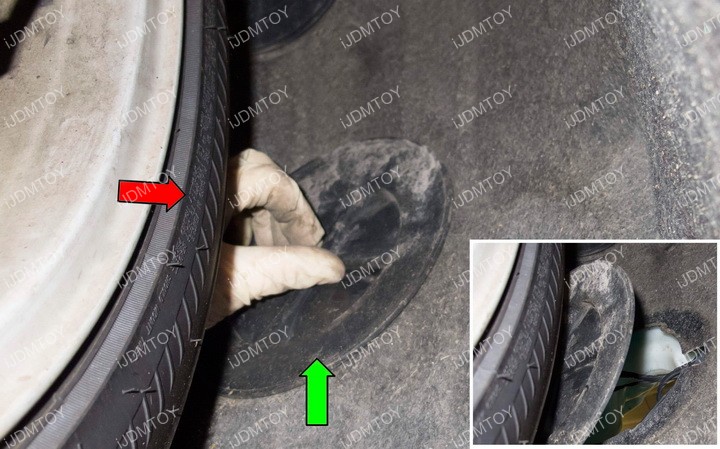
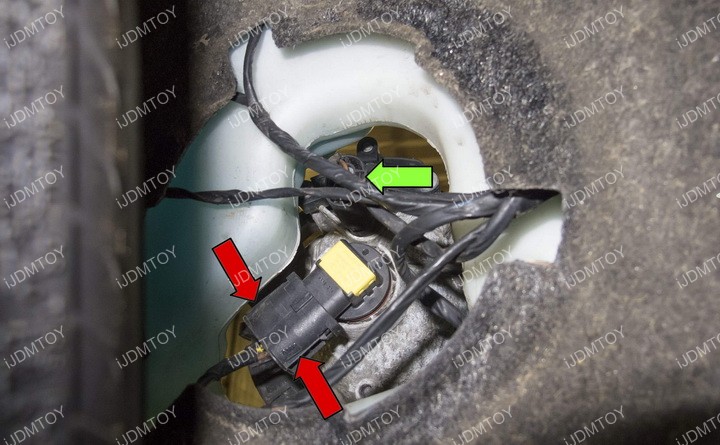
Step 1: Roll the tire so you can gain access to the gap hidden behind the tire. Remove the cap.
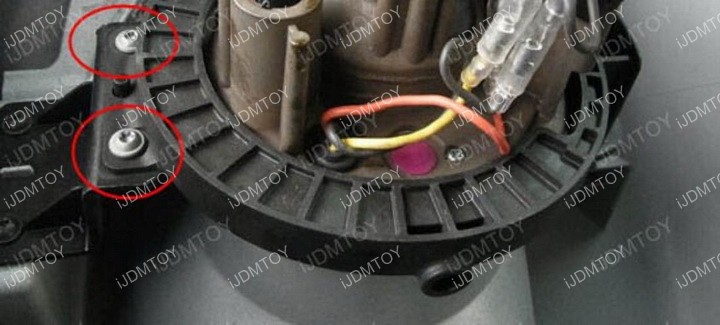
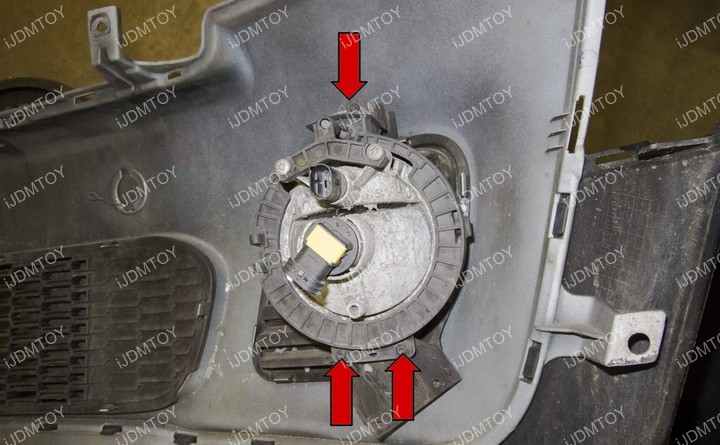
Step 2: You will see the stock parking light/fog light combo from the back of the lower bumper location. Remove the bracket ring that holds the parking light/fog light housing in place and unplug the wires on the stock parking light and fog light harness.
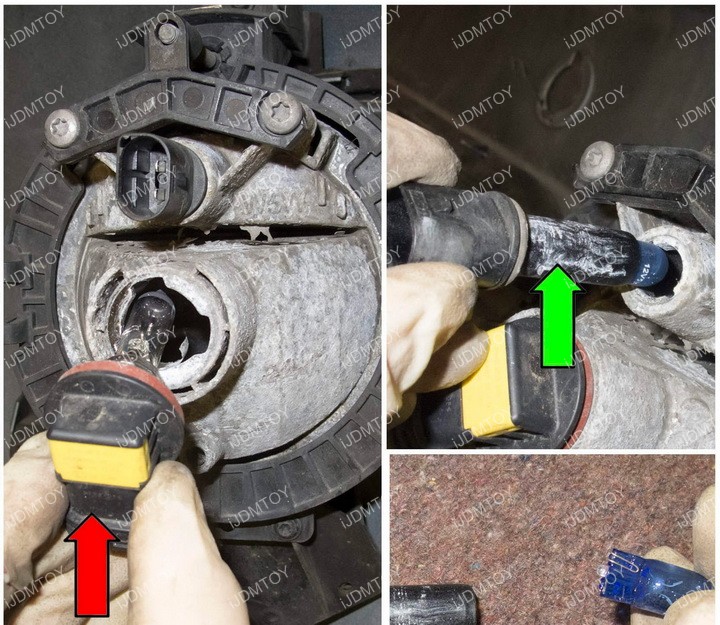
Step 3: Unplug the stock bulbs. You'll need to remove the stock fog light bulb and remove the stock parking light bulb, along with its base.
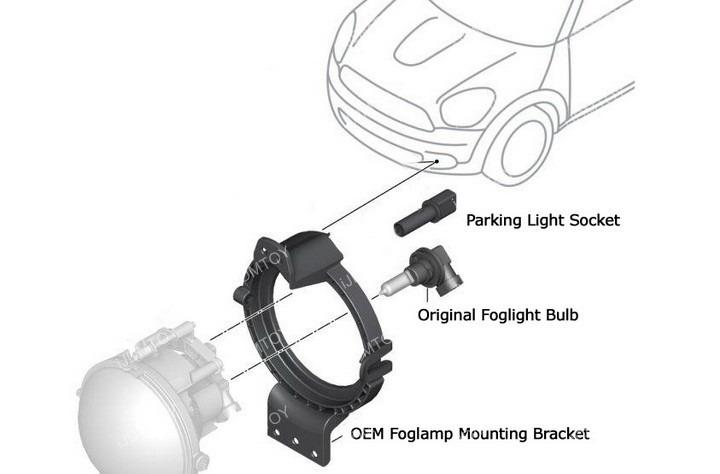
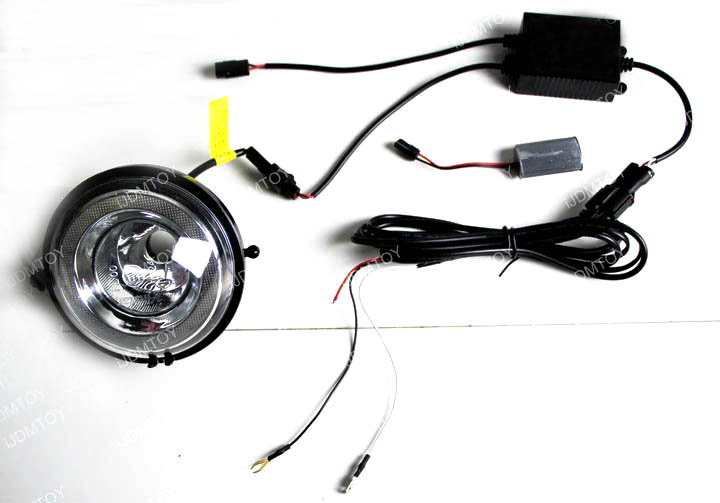
Step 4: These diagrams and wiring video below demonstrate how you will install your new MINI Cooper LED daytime running lights. You'll first need to directly replace the OEM fog light assembly with the new LED DRL. You will use the OEM bracket ring as well as the OEM fog light bulb to complete the installation. Screw the bracket ring in place and plug in the original fog lamp bulb.
Connect the MINI Cooper LED DRL lamp adapters to the module box. You must always connect the LED lamps to the module box or you may risk damaging the lamp. Then connect the module box to the wiring harness that has three wires (red, black, white).
Red wire: ACC 12V+ or Parking Light Positive
Black wire: Ground
White wire: optional to headlight + or fog light + (to turn off the DRL halo ring)
The additional decoder is to be plugged into the parking light socket. Since the LED DRL is replacing the parking light, we must plug in the decoder adapter into the parking light socket to prevent any error messages.
Check to make sure everything lights up and enjoy your new MINI Cooper LED Daytime Running Lights.