


How to make your own LED tester.
Please following the simple steps below to make your own LED tester to check the LED bulb polarities and also check whether a LED bulb is defective or not.
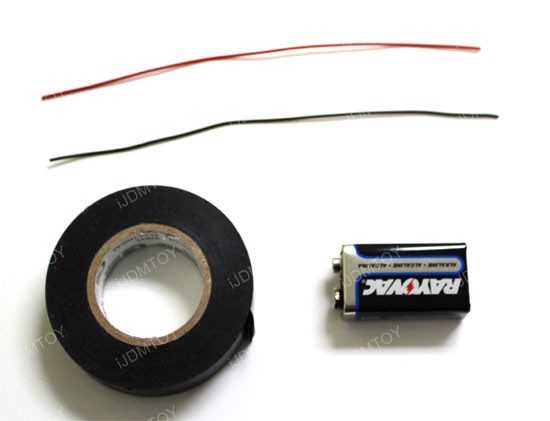
Step 1. First of all, you will need a 9Volt battery and two 5 inches long wires and black tape. (Please only use this 9V battery, never use any battery exceeds 12V which would potentially damage the LED and also do not use battery under 9V which is not big enough to light up the LED)
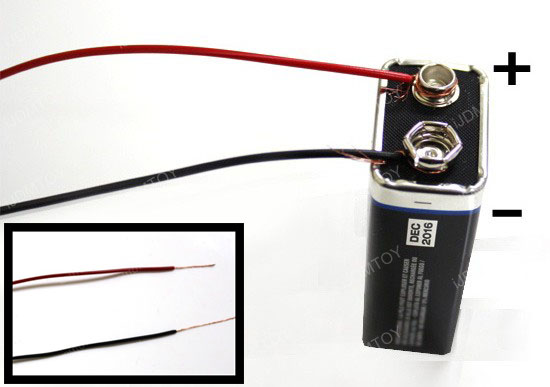
Step 2. Strip some plastic sheathing off of both ends of the wires and hook the wires to the battery's positive and negative. (Make sure to hook the Red wire to the battery positive terminal and the black wire to the battery negative terminal)
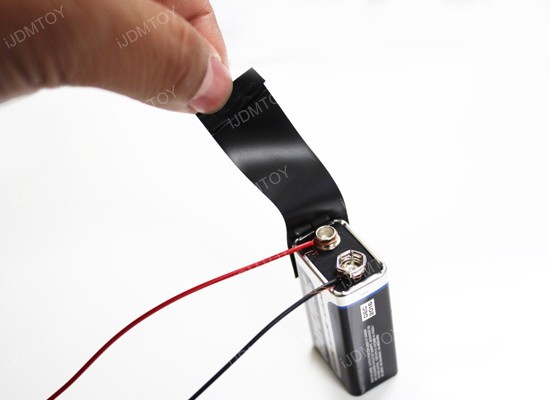
Step 3. Use black tape to cover the +/- terminals up.
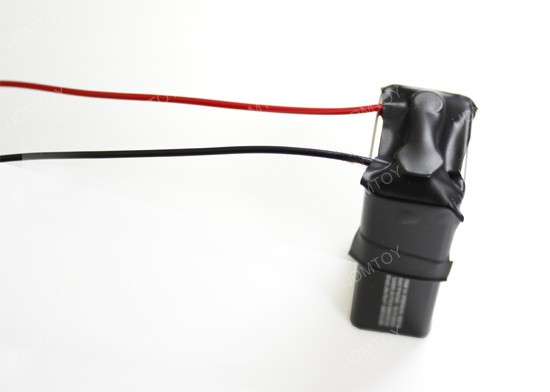
Step 4. Now you have made your own LED tester. You can tap the Red and Black wires to the LED bulb to check which side of the LED bulb is positive (polarity) and also to see whether a LED bulb is defective ( Note: if a LED bulb does not light up at the first time, please flip the two wires around and try again)