You can find the Nissan 370Z LED Reverse Light/Rear Fog Light (72-002) here
Step 1: Remove the clip pictured here to loosen the bumper and gain access to the stock rear reflector.
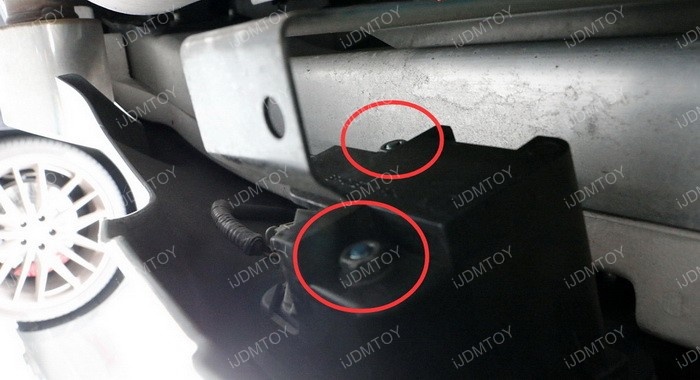
Step 2: These two screws circled in red hold the stock rear bulb-less reflector. Remove the screws.
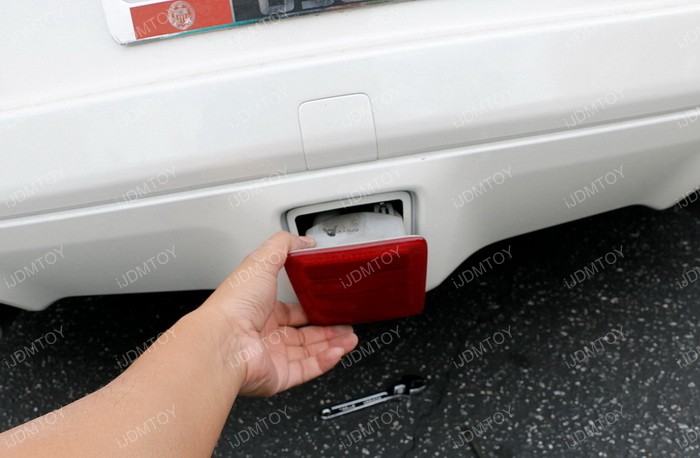
Step 3: Pull out the stock rear reflector.
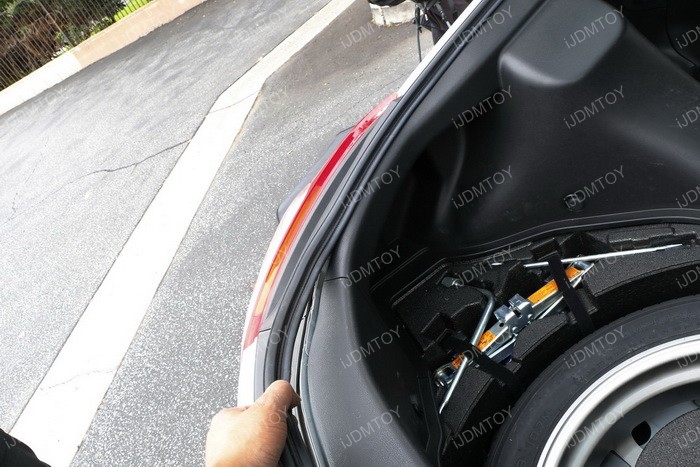
Step 4: Now we are going to begin to remove the trunk liners and molding. This is so we can gain access to the taillight and later pull up and tap the wires for the new LED rear fog light.
You will only need to remove one side of the trim and molding.
Since this is an add-on product, we need to tap the wires to either side of the tail lamp. We chose the left one. First, we removed the plastic cover above the tail lamp and found there are two screws holding the lamp. Remove them.
Then we are going to remove the plastic cover right above the tail light.
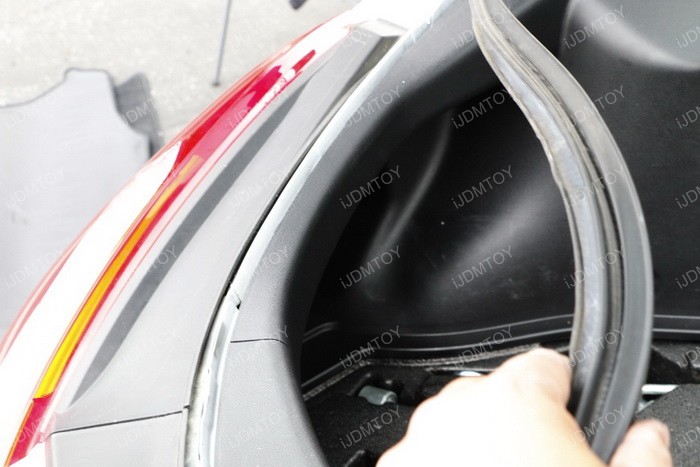
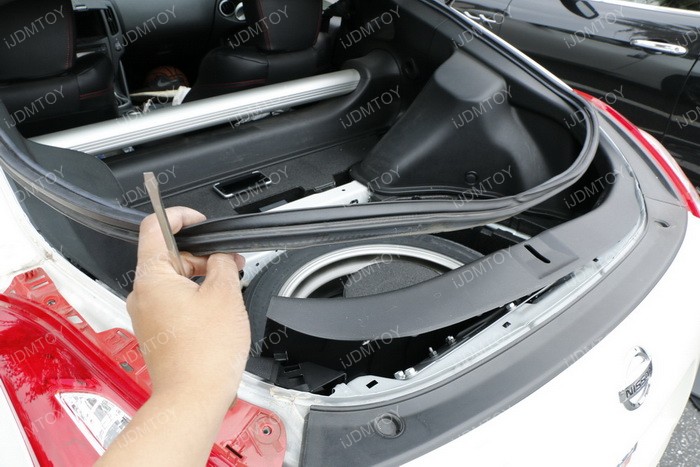
Step 5: Once you pull open and remove the trim and molding, you will have exposed two screws at the top of the taillight. Remove the screws.
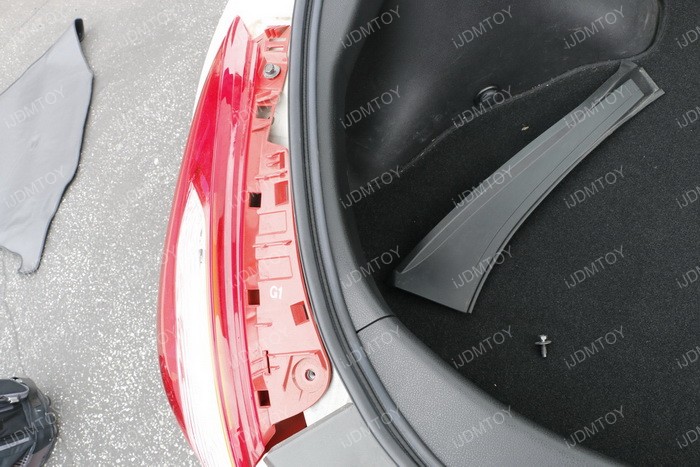
Step 6: Then pull out the rubber trunk molding.
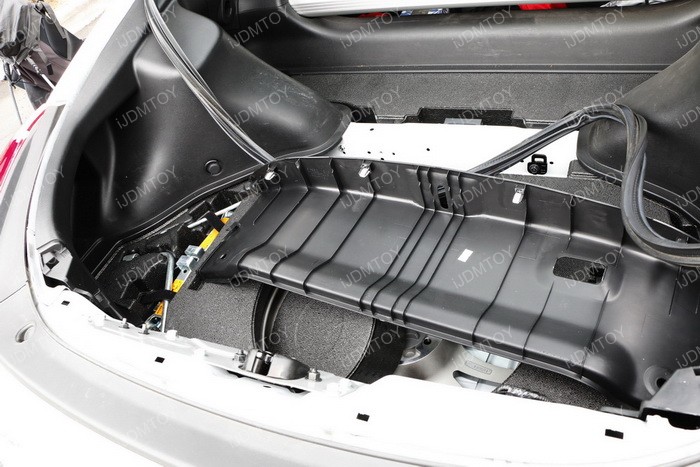
Step 7: You will need to remove three clips: the two circled in red on the side panel and one clip located on the center panel. You can use a flat head screwdriver to remove the clips.
Then you can pull out the center panel in the trunk. The center panel is held on by clips and easy to remove.
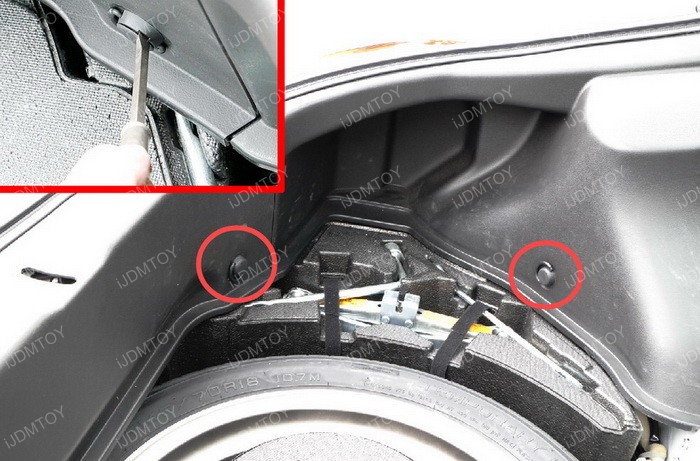
Step 8: Remove the last clip located on the side panel.
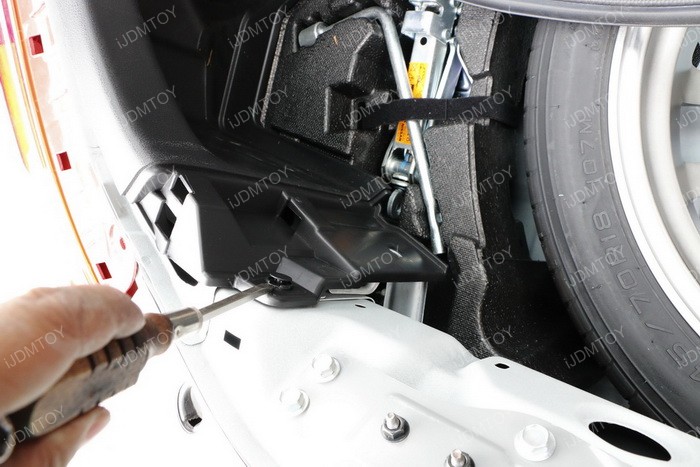
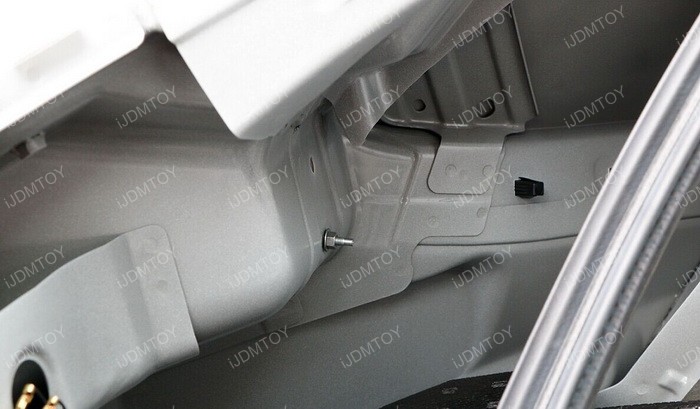
Step 9: After you remove the side panel, you will expose a nut and screw. Remove the nut.
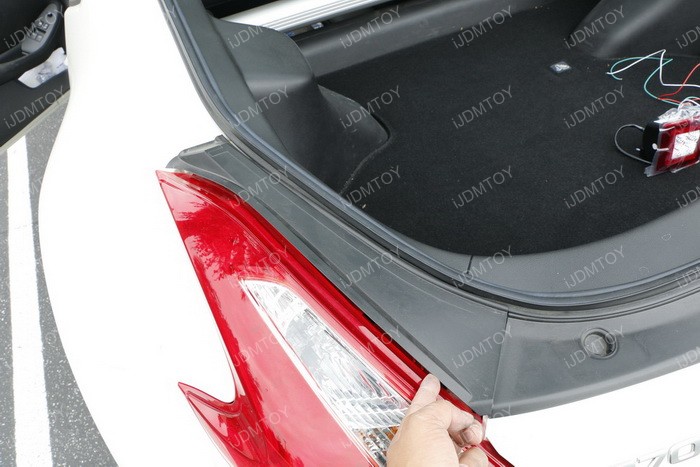
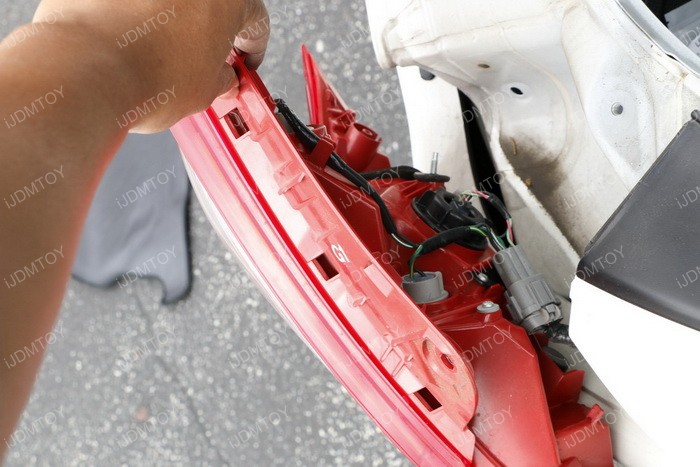
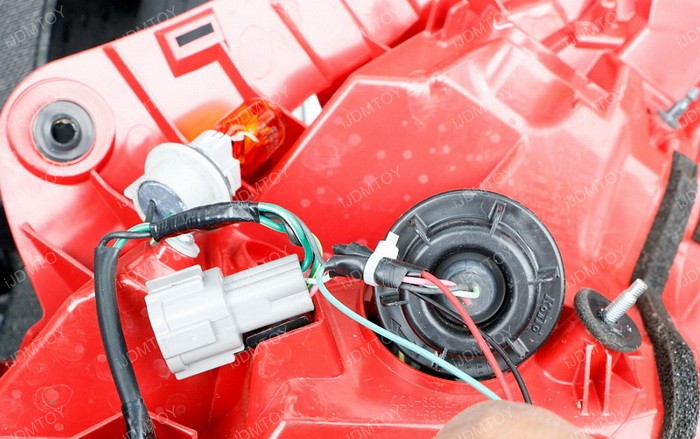
Step 10: Now that you have removed all of the liners, panels, molding, clips, and screws, you can pull out the taillight.
The gap next to the taillight is where you will be pulling up the wires from the LED rear fog light to connect to the stock tail light wires.
You can use a metal clothes hanger to make a hook so that you can pull the wires out through the gap. Better yet, grab a buddy to help you out.
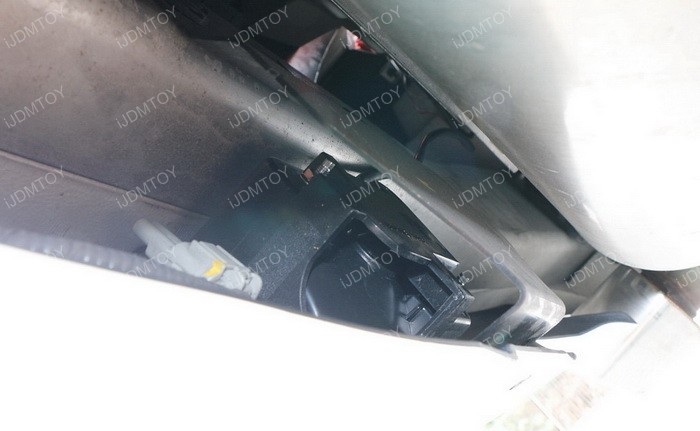
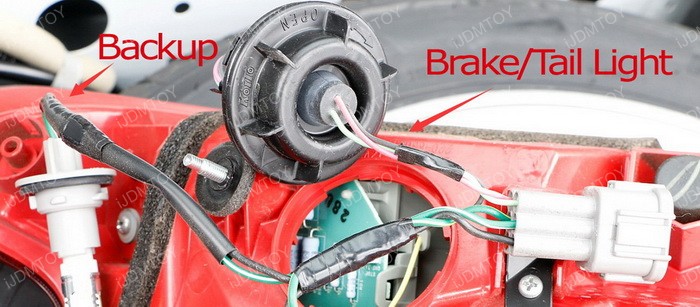
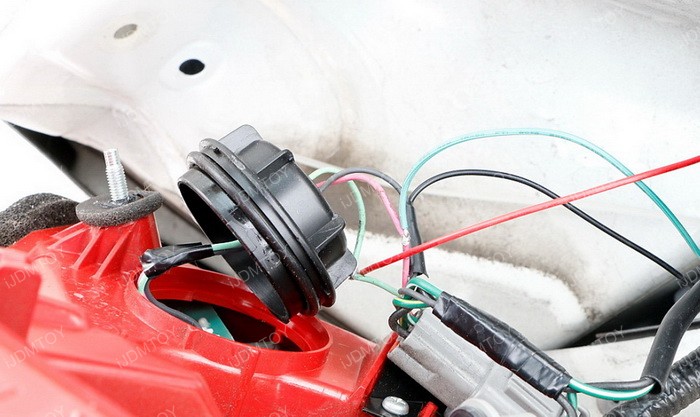
Step 11: This is the taillight/brake light module (3 wires) and the backup light module (2 wire).
Tap the wires to the corresponding brake light and taillight.
* We recommend you splice and twist the wires together, instead of using T-taps since there is a tendency for the T-taps to become loose.
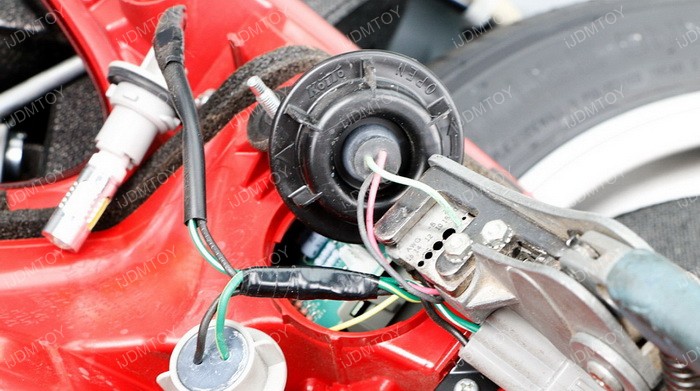
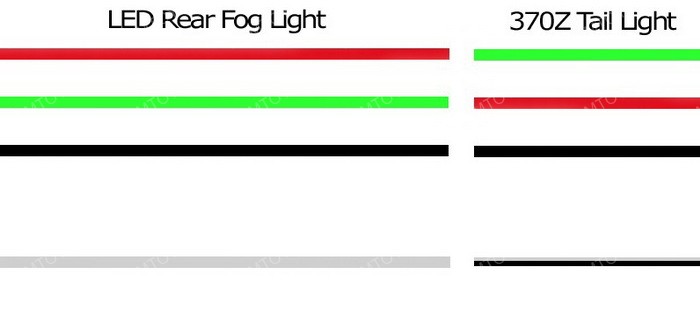
Step 12: In Japan, the stock wire colors matches our JDM LED 4th brake light, but in our case in US the wire colors are reversed. It's always a good idea to test which wire is for what function.
If after you tap the wires, the taillight does not turn on but only the brake light stays on, it means that your wires are reversed and you will have to switch them around.
Tap LED rear fog light black wire to stock black wire and the white wire to the reverse light positive (black/white striped stock wire)
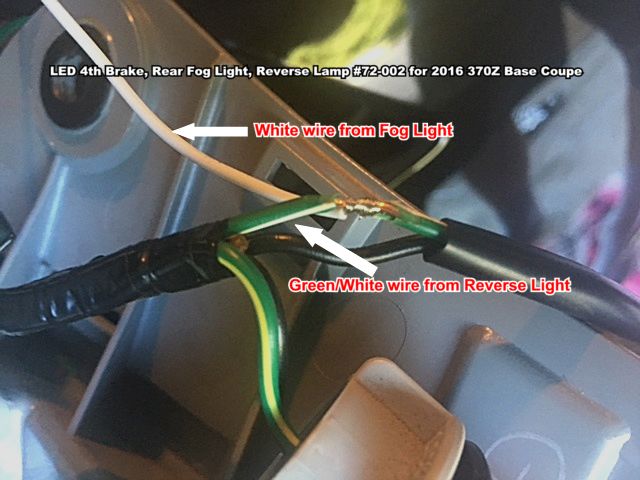
Note: One of our customers sent in a photo of the wiring on his 2016 Nissan 370Z. The wiring for his vehicle is slightly different from the wiring in this guide, so if your 370Z please refer to his diagram:
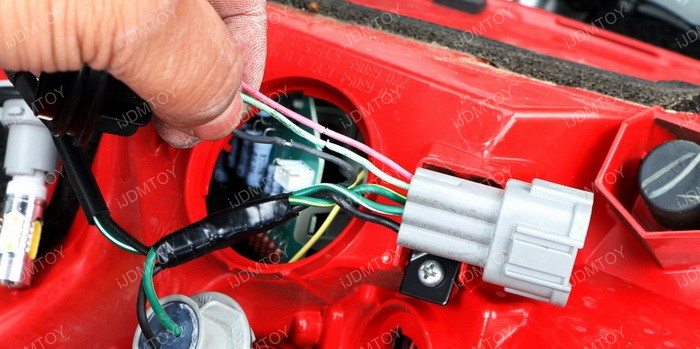
Step 13: Zip tie all the wires.
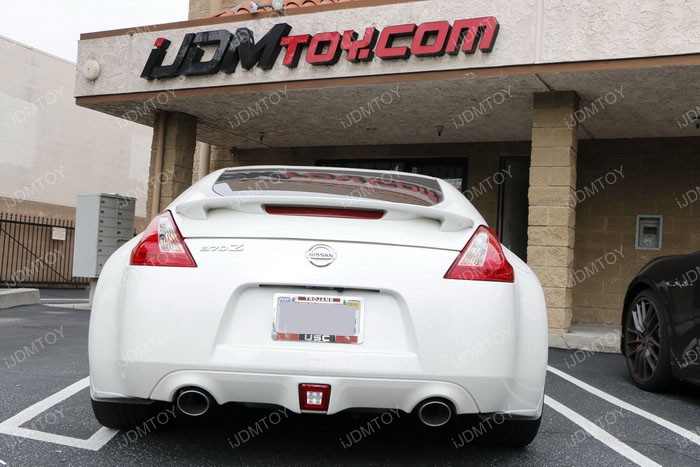
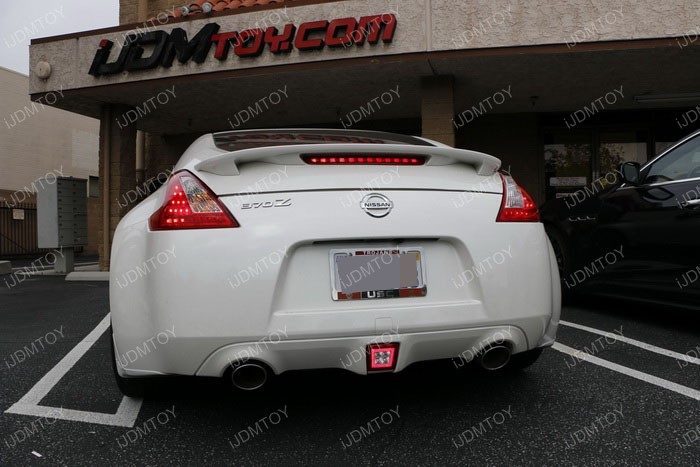
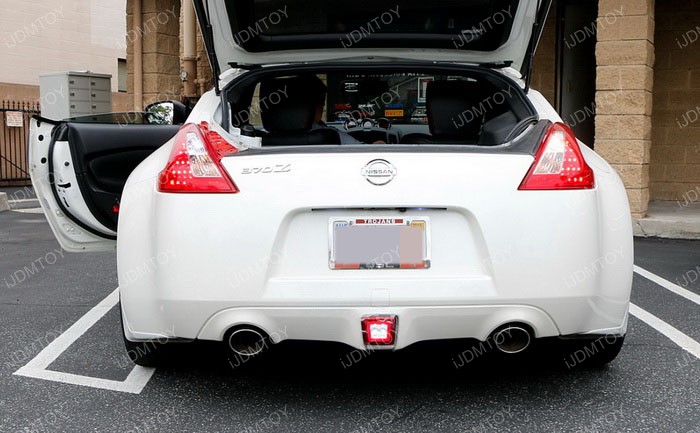
Step 14: Test to see if your LED center rear fog light works.
Step 15: If it does, put everything back in place. This includes all of the screws, clips, panels, liners, and molding that you have removed.
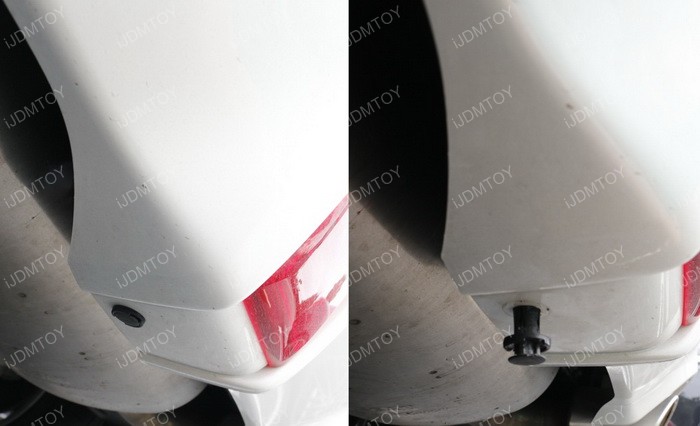
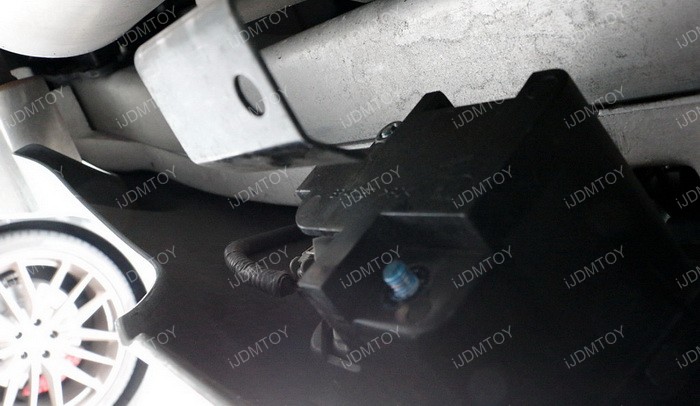
You will also need to access the bottom of the vehicle to reinstall your LED rear fog light using the screw included in the package.