How to Install Mercedes G-Class Full LED Tail Light Assembly
Leo came by our storefront with his Mercedes G63 to pick up a few new products for his luxurious SUV, and he stuck around just long enough for us to ask him if we can try out an installation for our rear LED turn signal tail lights. We learned quite a bit as the installation process took about 3 hours! Thankfully Leo was very patient with us and received the LED assembly for his troubles. We’ve overhauled our installation guide so you guys can get it right the first time. With that being said, this is how to install our G-Class LED turn signal tail lights.
>
Before you begin, please note that the LED turn signal tail light assembly will only fit in the 1999-2010 Mercedes W463 G-Class. This includes the G500, G550, G55, and G63. Also, make sure your G-Class SUV is completely shut off with the keys out of the ignition. You may risk getting an error message otherwise since the onboard computer will detect that you’ve removed the stock tail lights. You can access this install guide on our website as well.
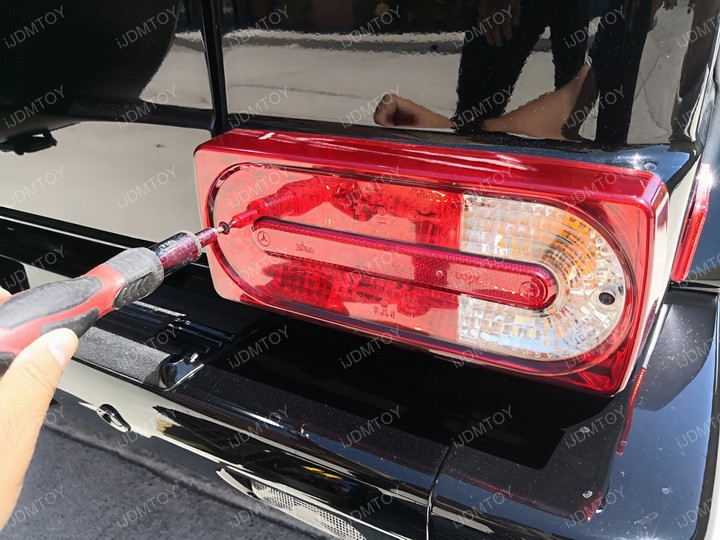
Step 1 is to unscrew the two bolts on your tail lights, allowing you to remove the OEM tail lamps.
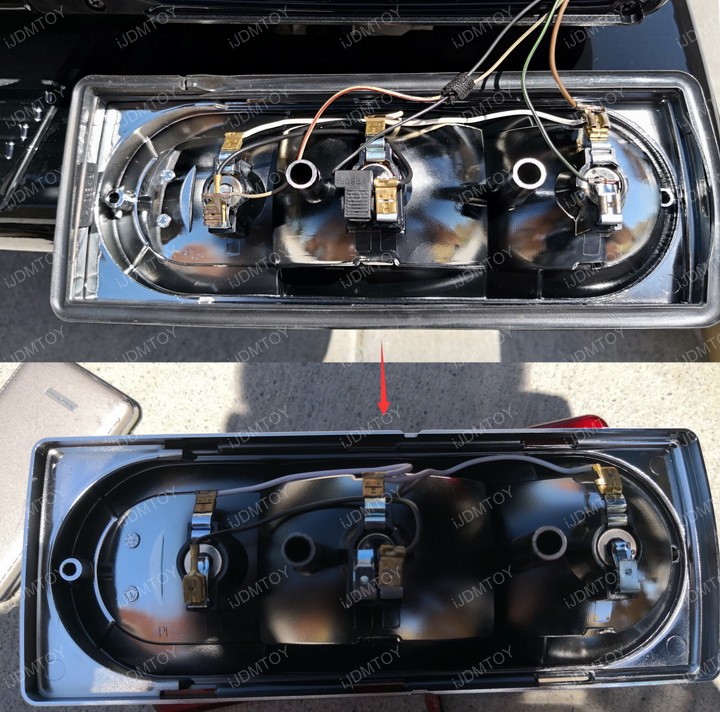
At this point, you’ll see how the wires are connected. We’ve included a label sticker sheet so that you can tag each wire according to their function. This is a very important step because wiring the LED turn signal tail lights incorrectly may result in partial light up, popping fuses, or triggering error messages. The wire colors vary with each G-Class so DO label your wires before disconnecting them! This was the reason our installation on Leo’s G-Class took so long.
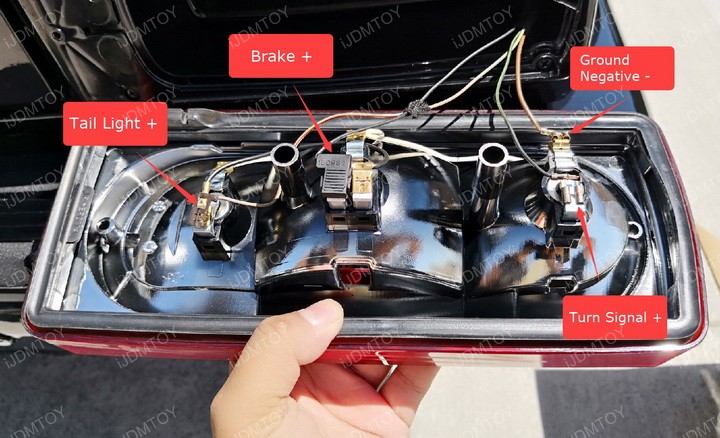
Once you’ve taken out your tail lights, step 2 is to remove the stock plastic tail light bracket. You will be replacing them with our own mounting brackets.
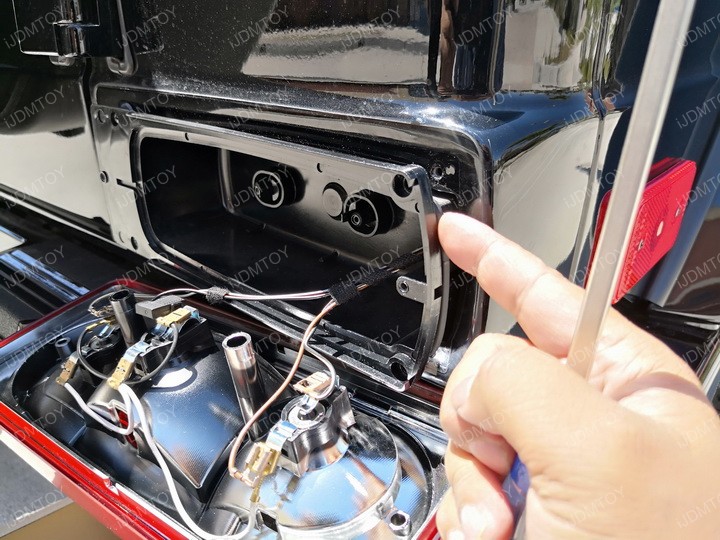
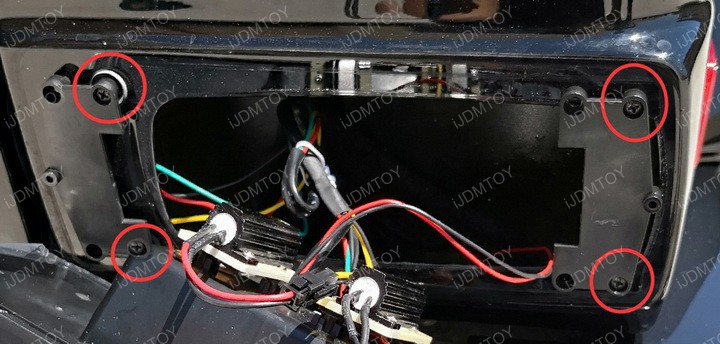
When bolting on the two tail light mounting brackets, screw into the outer holes on the right side and the inner holes on the left side.
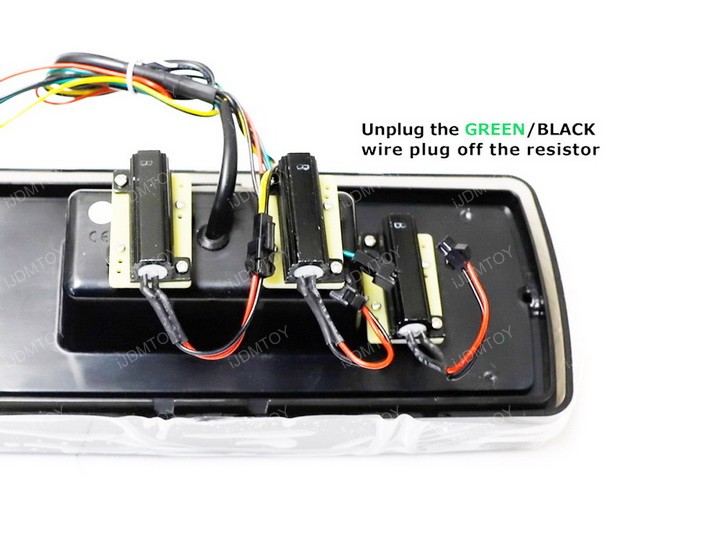
Next, unplug the green/black wire plug off the resistor. This will ensure you don’t get dashboard error warnings.
Take the rubber seal from the stock tail light assembly and apply it to the LED tail light assembly.
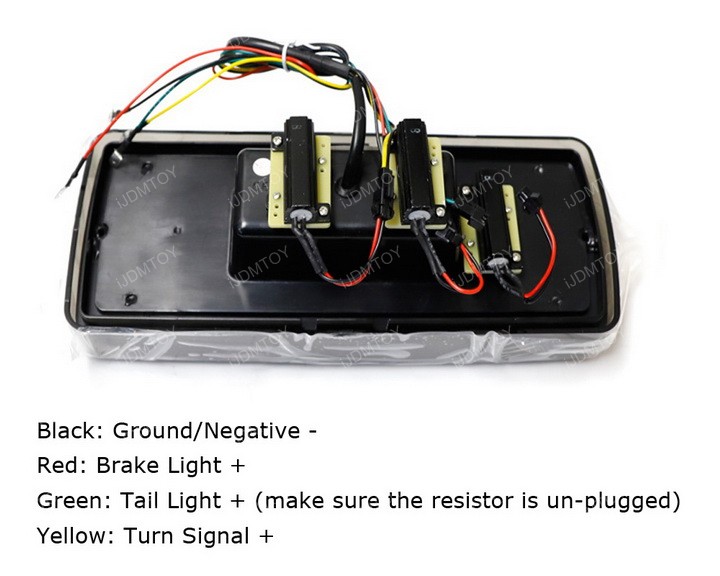
Tap the wires to their respective stock wires. The picture below will tell you which wire does what. Secure the connections with black electrical tape and bundle the wires together with zip ties. Aren’t you glad you labeled them?
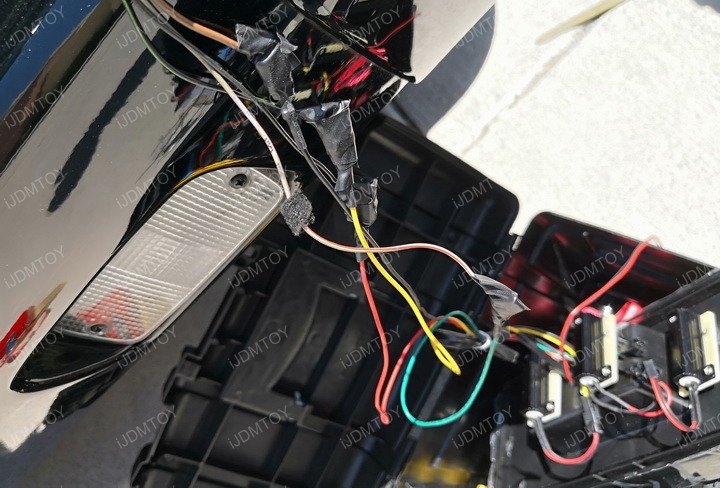
Test each LED turn signal tail light assembly to make sure they light up properly. Once you have, screw on the included longer bolts to finish the installation.
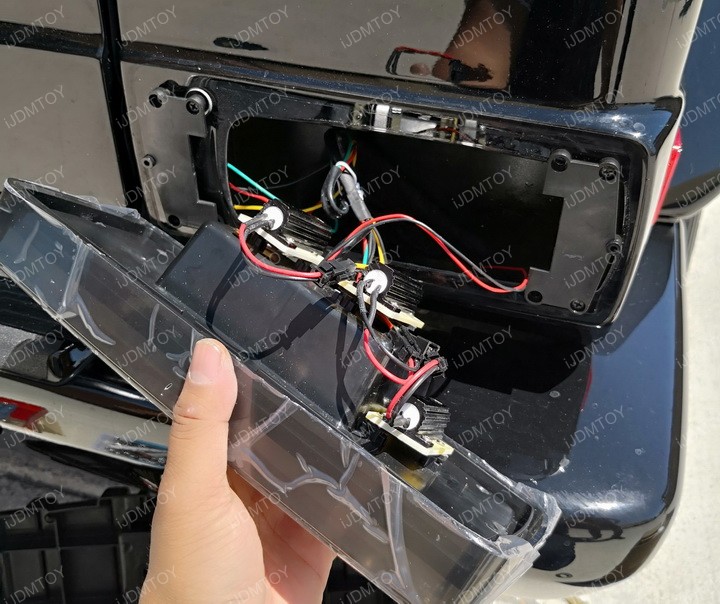
Whether you get red lenses or smoked lenses, your Mercedes tail lights are now more vibrant than ever. If you’ve installed the sequential turn signal lighting LED assemblies, then even more so! Thanks again to Leo for allowing us to install our LED turn signal tail lights on his Mercedes AMG.

